Tuesday, March 31, 2009
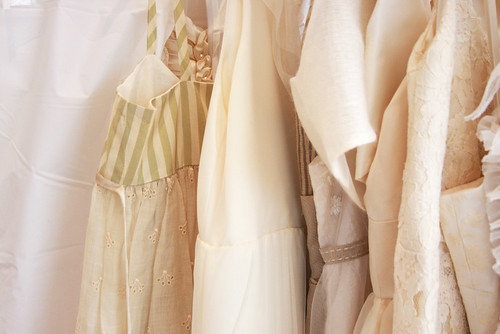
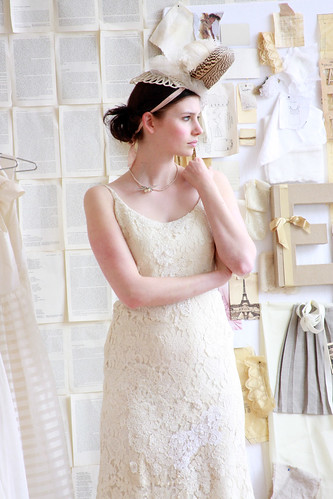
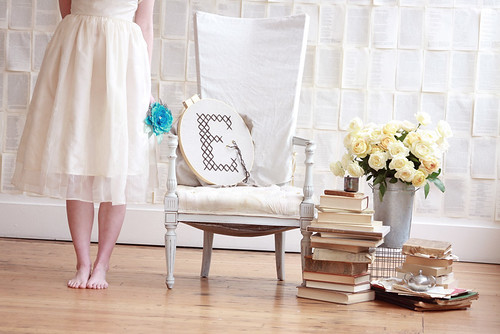
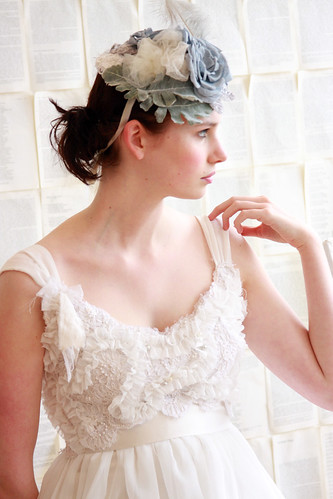
Wedding dream team collaboration :: Photo shoot
Dress extraordinaire, Elizabeth Dye
Photographer, Lisa Warninger
Stylist, Chelsea Fuss (of frolic!)
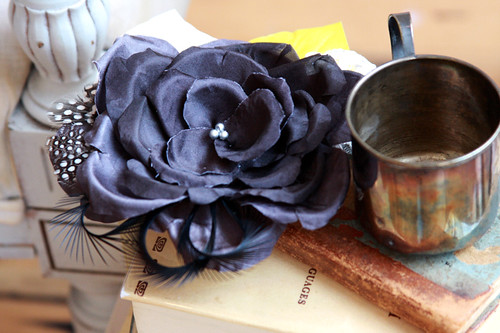
Accessories, Twigs & Honey (yours truly)
Model, Anna Adams
Location, Ace Hotel
These are just some of my photos... but more beautiful photos by Lisa should be coming in a few weeks.
More photos to come!
Thank you Elizabeth, Chelsea, Lisa, Anna, and Jaime!! I had a wonderful time!
Visit my Flickr photosream for more photos... HERE.
Friday, March 27, 2009
A new favorite piece :: just listed in my Etsy shop!
The inspiration board was made by the talented Jenna for her upcoming wedding and the dress will be made by her sister, Sarah, of hello, handmade (board and sketch credits go to Jenna and Sarah).
I love Marie Antoinette fashion and have been inspired before. Also, you know that show stopper hat I made for the Novel Romance bridal show last month? It is featured top right of this blog in the logo photographed by the fabulous Lisa Warninger (whom you already know and if you don't... you need to know of!). I received so many inquiries about that hat (expect to see more of that hat in the future)! BUT... that hat took forever to make. I think I was up until 4am hand sewing it together... so naturally, I have to price it accordingly. Anyhow, with this new inspiration and with current interest in the hat, I've decided to make more for the fashionably adventurous bride (yay, right??). Here is the newest of a whole new line I'd like to build on that is much more friendly on the wallet:
This piece is completely hand sewn and features something new and something old... lots of luxurious silk, lace, just the right amount of sparkle and a pretty ostrich plume (I'm on an ostrich kick as of late - expect to see much more ostrich!). In my SHOP right now. Enjoy!
Thursday, March 26, 2009
Wednesday, March 25, 2009
Current clothing crush :: Lauren Moffatt
I love androgynous looks.
This dress is my absolute favorite.
Go to this is glamorous blog for your chance to win a Lauren Moffatt dress!
Photo credits: Lauren Moffatt
Tuesday, March 24, 2009
Ever have one of "those" days?
I love the color of these hypericum berries. They remind me of this stunning and delicious dress.
Matt is too cute. He normally picks out the flowers at the shop and tells the lady to put them into a vase with fillers. He likes to pick out all the pretty blooms... regardless of the color coordination. I can just picture him now, "this one is pretty... that one is too... ooh, Myra would like this..."
He is going to hate me for typing this, but I thought it was too funny/cute. The other day, I was just exhausted and not in the mood to bake, but he was wanting sweets and all we had in the cupboards was a box of lemon bar mix. He baked it! I never even attempted lemon bars. While they were in the oven, I was going to cut his hair (I always cut Matt's hair), and he was like, "oh, hang on. We had better wait until the lemon bars are finished baking." ...while keeping a close eye on the oven. I don't know why I find this so cute. They were pretty tasty when finished! Previously, while going through the cupboards, I found a box of cake mix. And I thought, "I didn't buy this..." And then it dawned on me that Matt did and he just put it in there like, "oh, the box will just bake itself," as in if it is in there, Myra will automatically make them. So the lemon bars were a huge step for him!
Monday, March 23, 2009
Puppies :: They grow up so fast
Orders List :: Sorry for the delay!
1. thoang
2. Claudikc
3. jillianchong
4. tiff7000
5. jennmacivor
6. KateC.
7. ciaobella83
8. orchidlilly2222
9. jesseandgrace
10. teresa2020
11. esgal
12. hayley1601
13. blacksheepdesign
14. jenacat
15. mitchell821
16. Fran4362
17. bethharley
18. thedamaris
19. corbin1234
20. tahoebound2009
21. katielouu
22. ahhmee
23. copel008
24. blacmagik21
25. kooki8
26. StephanieS.
27. MelanieS.
28. nancy323323
29. ashleygranados
30. jessbruin
31. lamchops
32. HannahR.
33. n3lla
34. boycooper
35. ringobubblegirl
36. emilyjnelson
37. Mavouree
38. jkatlee
39. deen1213
40. twiggyforest
41. jessmark
42. beehandmade
43. kimatusc
44. SooN.
45. jlprellop
46. joanna056
47. BeccaG.
48. kdominelli
49. grlofthenorthcountry
50. myra1210
51. cdodson
52. boogan
53. brownkatharine
54. laurelnicole
55. LesaC.
56. JamieB.
57. KristaM.
58. ambutton
59. misshippo
60. whitcalgal
61. em969
62. jikiankc
63. fayelouise
64. zoyichka
65. hopechristine
66. botodesigns
67. DeannaM.
68. skinnerpa
69. tigerbaby25
70. KristaJ.
71. NicoleB.
Happy Monday!!
Sunday, March 22, 2009
Chicago Deep Dish Pizza
The only fault I saw, and later will change the next time I re-create his recipe, will be to omit the cornmeal requested as an ingredient for the pizza dough and halve the recipe. The recipe given bakes 2 (16- to 18-inch) pizzas. I bought a 16-inch deep dish pizza pan at the Costco Business Warehouse and for the second pizza, I used my 16-inch cake pan. The Costco deep dish pizza pan was "not" deep enough. Not even close. My cake pan had 2-inch sides and was about perfect.
WARNING: The recipe requests 6 Pounds of cheese and I would use all 6 pounds if an individual decided to not divide the recipe in half. The pizza eaten cold the next day is just about as divine as when the pizza first comes out of the piping hot oven.
The homemade sauce is a definite "must have" recipe that I will use over and over. Delicious!! I would like to emphasize using FRESH Basil, Garlic, and Oregano. Using dried herbs will be a noticeable difference.
It takes about 3 hours so make sure you have everything you need before you start. This recipe is expensive, probably comparable to what it would cost to buy them. The ingredients need to be fresh.
Best Deep Dish Pizza Recipe:
You'll be able to make two good sized pizzas with this recipe. It takes about 3 hours so make sure you have everything you need before you start. This recipe is expensive, probably comparable to what it would cost to buy the pizzas already baked. The ingredients need to be fresh, and if you substitute or don't do something the way I tell you to, don't blame me for the results. =)
Best Deep Dish Pizza - What you need to start:
You will need an electric mixer with a dough hook. If you don't have one you can try and follow along by kneading the dough yourself (You will need to add another 45 minutes to this process if you kneed the dough).
Make sure you have the following ready:
2 18" deep dish pizza pans - Don't use a baking dish, go out and splurge on a few pans, this is serious pizza and you shouldn't go screwing it up by trying to make it in a 9x15 baking dish it won't cook right, it won't be the same and you will probably end up thinking this recipe stinks.
2 Tablespoons of Sugar (Needs to be sugar, the yeast feeds on it and won't proof without it).
4 Cups of Warm Water (110 degrees when you pour it in the bowl it will cool by the time you get everything else done)
4 Packages of Yeast or if you have the jar you can do 8 teaspoons of Yeast.
1 cup of First Press REALLY GOOD Extra Virgin olive oil.
9 Cups of Flour (Up to 10)
1 c. yellow cornmeal (optional)...I will not add next time
Best Deep Dish Pizza - Technique
Proofing the yeast is an important part of this process. You want your bowl of water to be about 95 - 100 degrees. Mix in the 2 tablespoons of sugar and stir it with a whisk. Once you dissolve the sugar in the water, put the yeast in and make sure it all gets wet. (Yeast tends to float on the top and some of it won't proof if you don't wet it).
Now walk away from it for about 10 minutes. It should be in a big bowl because this stuff is going to FOAM up and it will spill over if you don't have a big enough bowl - you have been warned ;)
In your mixer mix the olive oil and 5 cups of flour (if using the cornmeal, add this in too). Mix it up for about 1 minute and add the yeast slowly while it is mixing up. Slowly add the rest of the flour and let the mixer mix on about 1/3 speed for 5 minutes. The dough should not be sticky or wet, it should feel like really soft smooth elastic.
Coat a plastic bowl with a little olive oil and put the dough into the bowl (Big bowl). Cover the top of it with a damp towel and let it rise until it is double the size.
Punch it down and let it rise again.
Best Deep Dish Pizza - Prep Your Pans First!
Prep your pizza pans, spread a little olive oil on the surface and sides and sprinkle yellow cornmeal on the bottom of it. This will prevent the pizza from sticking to the pan. Alternately (and I do it this way quite a bit) you can take REAL butter and really give it a good coating all away around and in the pan. Layer it on very thick. It gives the crust an amazing flavor. Sprinkle with yellow cornmeal the same way you would if you used olive oil.
Best Deep Dish Pizza - Mix Your Cheeses and Make Your Sauce
Make your sauce & cheese mixes while you are waiting around for the dough to rise. Here is what you do:
Cheese Mix:
4 Pounds of Grated Mozzarella
1 Pound of Provolone
1 Pound of Romano, Parmigiano, Asiago mix (You can get them predone at the store in the deli section)
Mix the cheese mix in a big bowl so it is blended well.
Sauce:
4 28 oz Cans of Plum Tomatoes, Drain them and then put them through your blender for about 10 - 15 seconds you want them to be crushed up and chunky, but not liquid.
5 Teaspoons of FRESH Chopped up Basil
5 Teaspoons of FRESH Chopped Oregano
2 Tablespoons of Sugar (Or Splenda, I use Splenda)
10 Cloves of FRESH Garlic Peeled and Crushed with a Garlic Press
Salt and Pepper to taste
1/2 cup of Parmigiano Cheese Grated
Combine the ingredients together and make sure it has good time to sit and steep in the acids from the tomatoes. This will bring out the flavors of the seasonings.
Best Deep Dish Pizza - Bringing Everything Together.
Once your dough has doubled again take it out and divide it into two sections with a knife. Roll it out onto your deep dish pizza pans (last chance to go out and buy pizza pans if you are using a baking dish you will not get the consistency you need and you will not be happy). When you are laying the dough onto the pan push the dough to the edge. You can then turn the pan slowly while you pull the dough up the sides. If you have extra dough (and you should) roll it flat put it on a cookie sheet mist it with some olive oil, sprinkle it with garlic powder, Parmigiano, a little salt and bake it with your pizzas. You slice it with your pizza cutter after it's baked and dip it the left over pizza sauce. Presto free pizza bread / bread sticks.
Now that you have your pizza dough ready take a brush and brush olive oil onto the dough. Add your toppings (I use Portabella Mushrooms, Italian Sausage, Pepperoni, Green Pepper, Onion and Black Olives.) on the dough, then put half of your cheese mix on one pizza, half on the other. Use it all!
Pour your sauce on top until it reaches the edge of the dough (which should be all the way up the side of the pan), spread it out evenly and sprinkle with Parmigiano. Note: For all you folks that have never had Chicago Deep Dish Pizza, the sauce is on TOP so it's a red top pizza. This is traditional, and trust me it is good!
Best Deep Dish Pizza - Heat Your Oven and Make Sure You Let It Cool!
Preheat your oven and bake for 25 minutes on 350 degrees. After 25 minutes crank the oven up to 475 and bake for another 10 - 15 minutes. You want to watch the pizza and take it out when the top is light golden brownish and the crust is a light golden brown.
IMPORTANT: Let this pizza cool for 20 minutes, if you do not it will be all over the place. Once it cools for 20 minutes it will be just the right temp and will come out of the pan the right way. Cut and serve. This recipe should feed a family of 7 with maybe a slice left over.
Thursday, March 19, 2009
Gorgeous bridal hair :: Styles on B
If you are a bride in the New York area and are searching for a stylist for your perfect wedding hair, visit Stacy of Styles on B. On top of being ultra sweet, Stacy is amazingly talented at creating stunning, sophisticated and feminine wedding hairstyles. I need an excuse to go to New York to have my hair styled by her! I found out about Stacy from a previous bride I worked with (remember Molly and Bill's gorgeous wedding?). Some of my favorites:
...and a twigs & honey piece!
View more of her beautiful work HERE.
Cheap treats :: Lovely thread earrings
I immediately snatched up two pairs:
Click here, and here
Guess how much??? I asked Matt, who was sitting next to me and his guess, "$50? Those are really intricate." Nope... only $7 per pair!!! AND $0 for shipping. Free shipping! Hop over to her shop and snatch up a pair for spring!
Photo credits: charsbeadcreations
Wednesday, March 18, 2009
Vacation shoes
Matt said they were "sexy"! Bonus!
Photo credits: J. Crew
In my spare time...
Somethings are easy and the easy things are hard. For instance, my lack of a mouse has helped me to heighten my keyboard shortcut skills to the point where I scare myself when I get into a crazy rhythm of ctrls and alts. But other things... yikes.
If this blog looks a bit janky over the next week or two, forgive me as my fingers fumble over the keyboard. I'm trying to make it prettier, I swear.
For real pretty things, visit Becky Kelso's website for understated, yet completely ga-ga gorgeous jewelry.... at the very least, to tie you over while my blog is on the fritz.
I love every single piece on her site. I want it all.
Found through Snippet & Ink
Photo credits: Becky Kelso
Monday, March 16, 2009
Lemon-Ginger Marmalade
For some reason I felt anxious about the idea of canning. To me, canning is usually reserved for summer time, with large quantities of everything ripe and juicy. The marmalade is a first winter attempt at canning and a small batch at that...6 cups maximum. I do not remember canning such a small amount of anything...ever. In the past, I forced myself to jump into canning by buying fruit and vegetables in bulk, straight from the farms. The idea was learn or have the produce spoil and lose all the excitement over saving so much money. I bought hundreds of pounds of peaches, apples, pears, onions, and tomatoes for just over 100 dollars the summer before last. The fun and feeling of accomplishment created an atmosphere of pride and excitement. I knew for sure, this time I would not forget and continue canning throughout the year. College, work, family, and life interfered with that thought process. Now, here I am, doubting myself again and thinking how much money I would actually be wasting to just let the lemons spoil or squeeze the juice out and make something else I could comfortably bake? Nope, I am doing this, wind storm or not.
Lemon and Ginger Marmalade
(adapted from Fine Cooking Magazine: March 2009) This golden-hued marmalade is right at home on toast, but it’s also divine stirred into plain yogurt or dolloped on coconut ice cream.
Makes about 5-1/2 to 6 cups
Ingredients:
1-1/2 to 2 lb. lemons (6 to 8 medium)
1/2 cup finely chopped fresh ginger
One 1-3/4 -oz. package powdered pectin
6-1/2 cups granulated sugar
(Ginger peeled with a spoon edge is better for preserving more ginger and only removing the actual peel.)
Directions:
Peel the zest from the lemons with a vegetable peeler, avoiding as much of the white pith as possible. Slice the zest strips crosswise very thinly at an angle to make strips about 1/16 inch wide by 1 inch long—you’ll need 1 cup of zest strips. Put the zest in a 4-quart (or larger) saucepan.
Trim the ends from the zested lemons to expose the flesh. With one cut side down on the cutting board, trim the pith off the lemon all the way around and discard the pith. Quarter the lemons lengthwise and remove any visible membranes and seeds. Slice the wedges crosswise 1/4 inch thick—you’ll need about 1-1/2 cups.
Add the sliced lemons, ginger, and 2 cups water to the lemon zest. Bring to a boil over medium-high heat, adjust the heat to maintain a simmer, and cook until the zest is soft and the membranes start to break down, 6 to 8 minutes.
Whisk the pectin into the mixture. Increase the heat to high, add the sugar, and bring to a boil, whisking constantly to smooth lumps. Boil vigorously for 1 minute, whisking constantly (move the pan off the burner momentarily if it threatens to boil over). Remove the pan from the heat and let sit undisturbed for 5 minutes.
Skim any foam and seeds off the surface of the marmalade. Stir gently to redistribute the solids. Transfer the marmalade to heatproof storage containers, let cool to room temperature, and then refrigerate for up to 1 month.
For longer storage at room temperature, can the marmalade. See the canning directions below.
To can the marmalade:
Transfer the hot marmalade to clean, hot canning jars, leaving 1/2 inch of headspace in each jar, and wipe the edges clean with a paper towel. Screw the lids on tightly.
Put the jars in a large pot of water fitted with a rack insert. The water should completely cover the jars by at least 2 inches. Return the jars to the pot of water and make sure the water covers them by at least 2 inches. Boil, covered, for 10 minutes. Use tongs to remove the jars; let them cool undisturbed on the counter. You should hear a popping sound as the jars cool, indicating that the vacuum seals have worked.